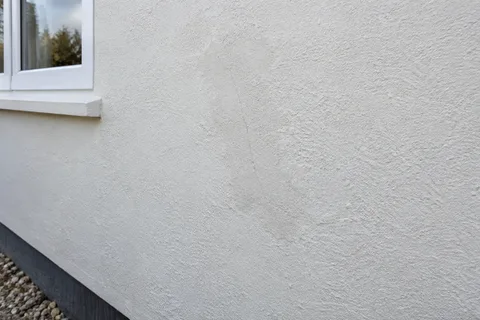
Repair the defect without losing useful surrounding fabric
Render Repairs Chester | Local Defects and Careful Matching
A good repair has a defined purpose and a sensible boundary. It addresses the failed material while retaining what can reasonably remain. The repair may sit beside a historic feature, a recent window or a previous patch with a different texture. The specification needs to account for those surroundings as well as the defect itself. A filler and a matching colour are not a complete answer until the cause and depth of the damage are understood.

On this page
Describe the defect without diagnosing it from a photograph
Cracking, bulging, hollow areas and surface staining are observations, not interchangeable diagnoses. Their position and development can help guide an assessment. Note when the change was first seen and whether there has been nearby building work or a known leak. Photographs taken from safe positions are useful for the initial discussion, especially if they show the wider elevation. They cannot establish whether the wall is structurally sound or how firmly the surrounding render is attached.
Where a bulge or movement raises concern about the supporting wall, the appropriate building professional should assess it before disturbance. The renderer should not be expected to resolve a structural question by removing the visible symptom and patching the surface. Our article on a bulging wall before exterior work explains how to separate those responsibilities. Once the underlying condition is understood, the render repair can be specified within a suitable overall plan.
- Map the damage Tapping finds hollow areas; cracks and their likely cause are noted.
- Cut back Failed render is cut out to a sound edge, usually squared off.
- Fix the cause Leaking gutters, sills without drips or render below the DPC are dealt with.
- Rebuild in coats Using a material compatible with the surrounding render and masonry.
- Blend the finish Texture is matched; colour may need a coating over the wider area.
The usual order of work. The survey and the chosen products decide the actual steps.
Find an edge that supports the repair
The final repair boundary may extend beyond the most obvious mark. Surrounding material can be loose or weak even where its face appears intact. Conversely, extensive removal may be unnecessary where sound compatible render remains. The assessment should establish the extent and explain how any further findings will be handled. A marked photograph or elevation helps identify the agreed area, while the specification describes the preparation and replacement layers. This makes the proposal more useful than a broad allowance to patch as required.
| Visible condition | Question before repair |
|---|---|
| Crack continuing through several materials | Is there movement or another underlying cause? |
| Local detachment beside a fitting | Has water entry or damage at the fitting been resolved? |
| Hard patch in softer retained render | Are the materials compatible and is selective replacement suitable? |
| Bulging area | Does the wall or covering require specialist assessment before disturbance? |
| Sound but mismatched patch | Is the issue texture, colour or both? |
Select material to suit what remains
A repair should relate appropriately to the background and the retained covering. Harder is not automatically more durable in the useful sense if it damages softer adjoining fabric. Where traditional materials are present, a lime repair may be appropriate, with binder, aggregate and finish selected for the actual wall. A modern proprietary render has its own repair requirements. Identifying the installed system, where possible, helps avoid using a generic patch material that does not fit the original build-up.
The depth and sequence matter too. A surface repair over a deeper void may appear complete while leaving the failure beneath it. The proposal should establish which layers are being replaced and how the background is prepared. If removal is required beside a delicate feature, the method needs suitable care. The pebbledash removal guide discusses the wider balance between exposing material and preserving it. A small repair deserves the same clarity, even though its footprint is limited.
Agree the appearance before promising an invisible patch
Colour matching is only one part of the task. Grain, profile, finishing direction and weathering affect how a repair reads. A patch can be compatible and well executed while remaining visible beside an old surface. The intended standard should be discussed honestly, with a sample where appearance is particularly important. On a historic elevation, preserving sound original material may be more valuable than achieving complete visual uniformity through a new covering over everything.
Where a coordinated colour is wanted, suitable decoration across a defined panel may be considered after repairs. The respray page explains why that can unify colour without removing differences in texture. A new wall finish is a broader intervention and should be assessed separately. The owner can then decide between a clearly visible local repair, a wider decorative treatment or a larger replacement with an understanding of what each changes and what useful material it retains.
Repair the associated detail, not only the mark beneath it
Damage below a sill or beside a pipe can recur if the adjacent water detail remains defective. The necessary associated work should be allocated to the appropriate trade and sequenced before the repair is closed up. A vague exclusion for plumbing or roofing is not enough if the rendering proposal depends on that work being completed. Make the connection explicit so the new surface is not left to tolerate the same avoidable wetting or disturbance that affected the old one.
Access and protection also need to fit the repair sequence. Work at height requires suitable arrangements, and materials may need return visits or curing periods. A small area does not necessarily make a single-day operation. Occupants should understand which routes or fittings will be affected and when. These practical arrangements help the repair proceed under the right conditions instead of being compressed around an access allowance that was too short for the specified method.
Keep enough information for the next repair
At completion, retain the location, materials and colour or finish reference. A simple record is particularly useful where several different repairs have accumulated over time. It helps a future contractor understand what was changed and which areas remain original. Inspect the adjoining details while access is available and confirm that fittings have been reinstated. The whole-house guide can help organise repairs within a longer refurbishment plan, while the Chester homepage links the relevant services. Local work should leave the building easier to maintain, not add another unidentified layer to its history.
Common questions
Can a hollow-sounding area be left and painted?
Its condition needs assessment. A coating does not restore adhesion between detached render and its background. The extent and appropriate treatment should be established before decoration, with the cause considered where the defect is associated with movement or water entry.
Is a visible repair necessarily a poor repair?
No. A compatible local repair can remain visible because the surrounding material has aged or has a different texture. The agreed visual standard matters. On some buildings, retaining sound fabric is preferable to covering a much larger area solely to hide the patch.
See housing and planning information for Chester and nearby places, including the source and geography behind each figure.